
Views: 269 Author: Long Win Display Publish Time: 2026-09-29 Origin: Site


Content Menu
● Start With a Complete Display Brief
● Choose a Format Around Shopper Access
● Engineer the Board and Structure
● Follow a Six-Gate Production Process
● Match Printing to the Campaign
● Test the Actual Distribution Route
● Compare Flat-Pack and Pre-Assembled Costs
● Measure Results After Store Rollout
● Check Import Classification Before Quoting
>> 1. Can cardboard display stands hold heavy products?
>> 2. Is a 3D rendering enough to approve production?
>> 3. Is E-flute better than B-flute?
>> 4. Can a display ship pre-assembled?
>> 5. How can a countertop PDQ be kept from tipping?
A custom cardboard display stand succeeds when its structure, graphics, product load, and delivery format work together. A striking rendering is not enough: the display must arrive intact, fit the retailer's space, hold the merchandise, and be simple for store staff to install. This guide shows retail brands how to brief, prototype, print, test, and ship a custom POP display with fewer surprises.
Long Win Display designs, customizes, manufactures, and offers pre-assembly for cardboard retail displays. The checks below are a practical framework for discussing a project—not a claim that one board grade, shelf design, or shipping method suits every campaign.

Before requesting a dieline or quotation, define the job the display must do. A countertop tray for cosmetics, a floor stand for bottled products, and a bulk dump bin present different loading and shopper-access problems. If the brief contains only artwork and overall dimensions, the structural designer must guess at many of the decisions that determine cost and durability.
Provide the design team with:
- Products: Physical samples or packed dimensions, unit weights, fragility, and SKU count.
- Merchandising plan: Units per shelf, desired facings, replenishment method, and expected campaign duration.
- Store requirements: Permitted footprint and height, placement, sightlines, and any retailer-specific specifications.
- Distribution route: Flat-packed, assembled at a distribution center, or pre-assembled or pre-packed before shipment.
- Brand assets: Approved artwork, color requirements, barcode positions, and any claims needing legal review.
- Acceptance criteria: Allowable shelf movement, visible damage limits, setup expectations, and required transit tests.
Ask the retailer or distributor for its current requirements. Do not assume that a common pallet footprint or an attractive concept drawing automatically qualifies a display for a particular store.
A cardboard display is a merchandising structure, not simply a printed shipping carton. Select the format by considering where shoppers will encounter it, how they will remove products, and how staff will restock it.
| Display format | Typical use | Design question to resolve |
|---|---|---|
| Countertop PDQ tray | Small products and impulse purchases | Does the front lip hide the pack or allow the tray to tip as stock runs low? |
| Floor display stand | Promotions and multiple SKUs | Will shelves remain level, and can staff assemble the stand easily? |
| Sidekick or power-wing display | Space beside an existing fixture | Does its mounting method match the retailer’s fixture? |
| Dump bin | Individually packaged bulk goods | Can shoppers reach products without crushing those beneath? |
| Shelf-ready display box | Stock placed directly onto a shelf | Can staff open it without damaging the graphics or merchandise? |
For a countertop PDQ display, check balance when it is fully stocked, half stocked, and nearly empty. Removing products changes the center of gravity. A tall header or narrow base can make that change more noticeable. Set the front lip high enough to retain products but low enough to keep their identifying features visible. Validate the result with actual packs rather than applying a universal visibility percentage.
Corrugated board combines linerboard with a fluted medium. Its flutes contribute cushioning and bending resistance; in suitable structural orientations, they also help carry compression loads. The Fibre Box Association notes that smaller flute profiles generally offer better graphics capability, while larger profiles generally provide more cushioning and vertical compression strength. Neither observation is a stand-alone load rating for a finished display.
E-flute may suit compact, graphics-led parts. B-flute can be considered for many structural components. Double-wall board or additional reinforcement may be appropriate for heavier merchandise. The right selection depends on board grade, span, joint design, loading pattern, and expected conditions—not the flute letter alone.
Review four failure points in the first prototype:
1. Shelves: Place products where they will sit in-store and check for sagging. A folded or rolled front edge, shorter span, or engineered reinforcement may help.
2. Sidewalls: Check whether load-bearing panels and flute orientation support the intended load path.
3. Base: Test stability with full and depleted stock, especially if the header is tall.
4. Joints: Inspect locking tabs and glued areas after assembly and handling.
A white, unprinted sample is the point at which a promising dieline becomes a testable object. Load it with real merchandise before approving print tooling. Avoid publishing a single "safe load" or humidity adjustment for all displays: those figures require a defined material, structure, exposure, and test method.

A clear approval sequence prevents artwork from getting ahead of structural decisions.
1. Confirm the brief. Agree on SKUs, display quantity, store constraints, service life, and delivery format.
2. Create the structure. Develop a CAD dieline covering material thickness, folds, locking features, supports, and packed dimensions.
3. Evaluate a white sample. Assemble it without special coaching. Add actual products, then check access, replenishment, sagging, and tipping.
4. Approve graphics. Put artwork on the final dieline and inspect a physical proof for color, legibility, barcode location, and cut-to-print alignment.
5. Validate shipping. Test the display together with the carton and protection it will use in distribution.
6. Release production. Sign off on the final sample, packing method, carton markings, inspection criteria, and assembly instructions.
Keep the approved dieline, material specification, print proof, sample photographs, and test findings together. If a shelf changes between prototypes, record what changed and why. A short assembly video can reveal unclear steps more effectively than another drawing.
Printing method should follow the graphic requirements and production plan. Direct flexographic printing may suit simpler artwork and repeat volumes. Digital printing can make prototypes or smaller runs easier to revise. Offset printing onto a smooth sheet, subsequently laminated to corrugated board, can be considered when detailed imagery and a more refined printed surface matter.
Request a physical proof on the proposed material. Colors viewed on a backlit screen will not necessarily look the same as ink on a liner. Assess copy at the distance from which a shopper will see the display, and check whether decorative graphics compete with the products themselves.
Treat special finishes as sample-dependent decisions. Metallic effects, coatings, and spot finishes can behave differently on different surfaces. Before approval, also confirm that barcodes remain usable and that promotional or regulated claims have passed the brand's review.
The shipment is more than the stand. It includes the merchandise, protective carton, pallet pattern, and every handling step before installation. Choose a test plan for that complete configuration.
The International Safe Transit Association identifies Procedure 3A for qualifying individual parcel shipments, 3B for less-than-truckload shipments, and 3E for similar packaged products in unitized full-truckload shipments. These are different distribution scenarios, not interchangeable badges to put on every display. Confirm the retailer's current protocol and the appropriate test with the laboratory before testing.
Define failure in advance. It might mean a torn tab, damaged product, visible print abrasion, a leaning stand, or setup that exceeds a retailer's allowance. Pack and load the test sample as it will actually ship. A display that appears sound on a dry workbench has not demonstrated that it will survive repeated handling or challenging storage conditions; retail packaging assessments can include compression, vibration, shock, and environmental conditioning.
When a sample fails, photograph the location, record the conditions, make a traceable change, and retest against the same acceptance criteria. That turns testing into design evidence rather than a last-minute pass-or-fail exercise.

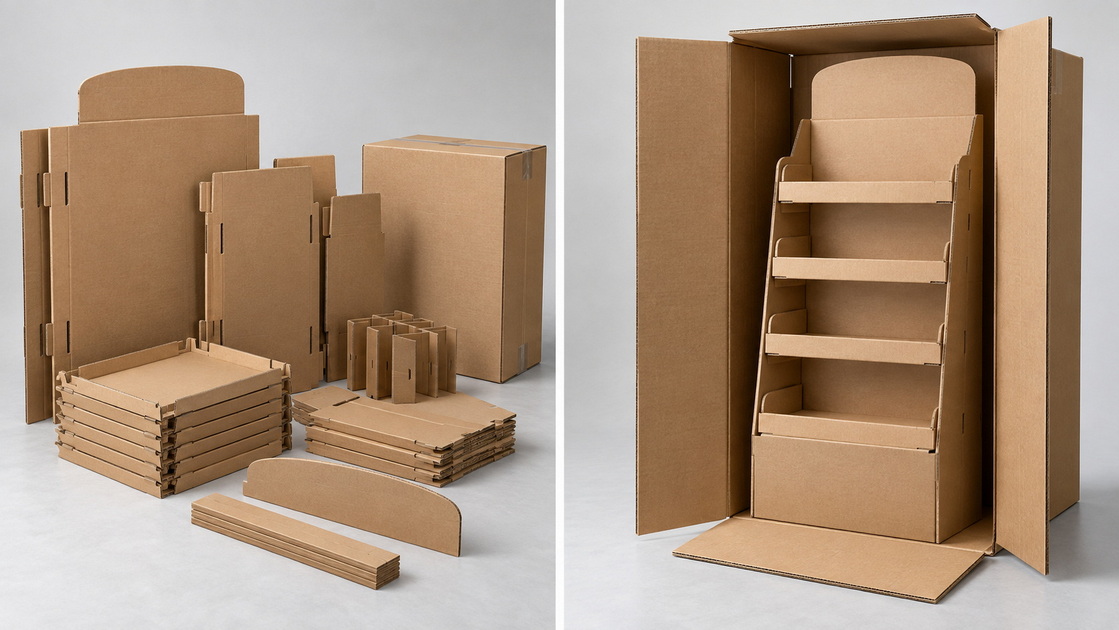
The lowest factory unit price may not produce the lowest cost per usable store display. Flat-packing can reduce shipping volume but moves assembly work elsewhere. Pre-assembly or pre-packing can remove setup steps, yet may increase carton size or the need for transit protection.
Compare both options using the same product count and protection standard. Include:
- Display, print, tooling, and packing costs.
- Packed dimensions, carton count, and freight quotations.
- Warehouse or store labor for assembly and loading.
- Damage, replacement, and store-rejection risk.
- Time required to put a compliant display onto the sales floor.
For example, saving five minutes of store labor is valuable only in context: multiply it by the planned store count, then compare the labor cost with the additional freight and protection costs of a pre-assembled unit. Ask for packing drawings and an assembly-time trial rather than deciding from unit price alone.
A display cannot influence shoppers if it never reaches the floor. Track installation and condition separately from sales so the next design addresses the right problem.
- Usable-arrival rate: Displays received without unacceptable damage divided by displays delivered.
- Installation rate: Displays installed divided by displays delivered to stores.
- Setup time: Minutes from opening the carton to a stocked, store-ready unit.
- In-store condition: Shelf sag, leaning, worn graphics, and missing components at planned checks.
- Commercial outcome: Units sold per store per week, compared with a suitable baseline or control where available.
Collect dated photographs at delivery and after restocking. Record issues by store, SKU, carton configuration, and production batch. Sales changes alone do not prove that the stand caused an uplift; price, promotion, placement, and stock availability also matter. The purpose of these measures is to make the next campaign easier to improve.
Do not select a U.S. tariff code solely because a stand is corrugated or ships filled with merchandise. Construction, use, and import facts matter. In one U.S. Customs ruling, a corrugated PDQ unit shipped pre-filled with retail merchandise was considered separately from its contents because it functioned as a display rather than adequate shipping protection. That ruling illustrates why "pre-filled" does not automatically mean "classified as product packaging"; it does not determine the code for another design.
Before finalizing landed cost, give the importer and customs broker accurate drawings, material descriptions, photographs, intended use, and shipping configuration. They should check the current classification and applicable duties for the actual shipment.
For relevant U.S.-bound ocean cargo, U.S. Customs and Border Protection states that Importer Security Filing information must be submitted no later than 24 hours before loading aboard the vessel. Coordinate this with the importer or its agent; the factory's dispatch date is not a substitute for the filing deadline.
They can be engineered for heavier merchandise, but capacity must be evaluated for the complete structure and actual loading conditions. A flute designation by itself does not certify shelf strength.
No. Use it to review appearance and folding, then test a physical prototype with real products before mass production.
Neither is universally better. Smaller flutes can favor graphics, but board grade and structural design still determine whether a display performs as required.
Yes. Compare protected carton size, freight, handling, and retailer receiving requirements with the flat-packed option before deciding.
Test the finished design with its actual header and products when full and nearly empty. Adjust its footprint or support structure based on the observed balance.
1. Long Win Display / PopDisplay, "[How to customizable cardboard display?]". Source article for the original themes of structural design, white samples, printing, PDQ displays, and logistics. Its first-person examples and numerical rules were not treated as independently verified results. [popdisplay]
2. Fibre Box Association, "[What Is Corrugated?]". Background on linerboard, flutes, combined board, and the general trade-offs between flute profiles. [fibrebox]
3. International Safe Transit Association, "[Test Procedures]". Scope and intended distribution scenarios for ISTA 3A, 3B, and 3E. [ista]
4. Intertek, "[Retail Packaging Testing for Big-Box Compliance]". Examples of retail distribution risks and packaging test capabilities. [intertek]
5. U.S. Customs and Border Protection, [PDQ paperboard display ruling NY N241091]. Example of fact-specific classification treatment for a PDQ display; consult the ruling for its precise circumstances. [customsmobile]
6. U.S. Customs and Border Protection, "[Import Security Filing—When to Submit to CBP]". Official filing-timing guidance for applicable U.S.-bound ocean shipments. [help.cbp]


